YOU SPENT $2000 ON WHAT???
Page 1 - Page 2 - Page 3 - Page 4 - Page 5 - Page 6 - Page 7 -
Most glaring problem was cranking the saddle up and down the bed - it was stiff, there were a couple of hard spots, and one where it seemed to skip a tooth on the rack. I sent off an email asking for assistance. Probably the best thing I can do here is quote most of it verbatim:
April 5 2002
Argh. Sorry to ask for help like this, but I'm in a bit of a hole.
As you know, I bought a metric roller bearing Hercus (ARM) from a machine reconditioners. In pieces.
The deal was this: rather than take the pallet of bits away, I would pay to have the machine rebuilt, repainted, assembled and aligned. They said delivery would be a week, I said there was no hurry, take your time, do it properly, I'll take it in six weeks. I paid cash up front and sat back to await developments.
Two problems: one, I am way too trusting of people; two, they's been in the horse tradin' business for ayn awful long tayime.
The lathe's arrived, with the original 415V motor instead of the dual voltage replacement paid for, and none of the extra tooling that had been promised.
I went and got the motor. Got laughed at when I asked for the tools - "Not at that price!"
Last night I bored the new pulley to fit, made new motor mounts, and fitted the inverter. Motor is fine, even though underpowered (1/2 horse). I was happy just to get it running before bedtime.
I took today off work and spent all day in the workshop. I started at the headstock and worked my way along.
What became immediately apparent, was that the pallet load of parts had been thrown together at the last minute, and then painted. In that order. (Note - since writing this, the subassemblies seen in the original pics were painted as they were, then assembled.)
There is supposed to be new headstock bearings fitted. I presume there are. They are (to my mind) very noisy, and get warm (not hot) after five minutes running light at high speed. The spindle is very stiff to turn by hand.
After putting a little oil in the pulley, and squirting quite a lot of oil in the headstock oilers, it freed up a little but it still requires effort to turn.
My limited experience of roller bearing headstocks is that if you pull the backgear pin, the spindle should spin very freely and if its got a chuck, take a few seconds to stop. I can grab the spindle nose and only just turn it by hand.
I've no idea what the bearing preload should be but I'm picking its wayyy to high. I slackened off the collar on the outboard end of the spindle but I think that was only to adjust end float; certainly it hasn't made any difference. I don't know how to adjust the preload.
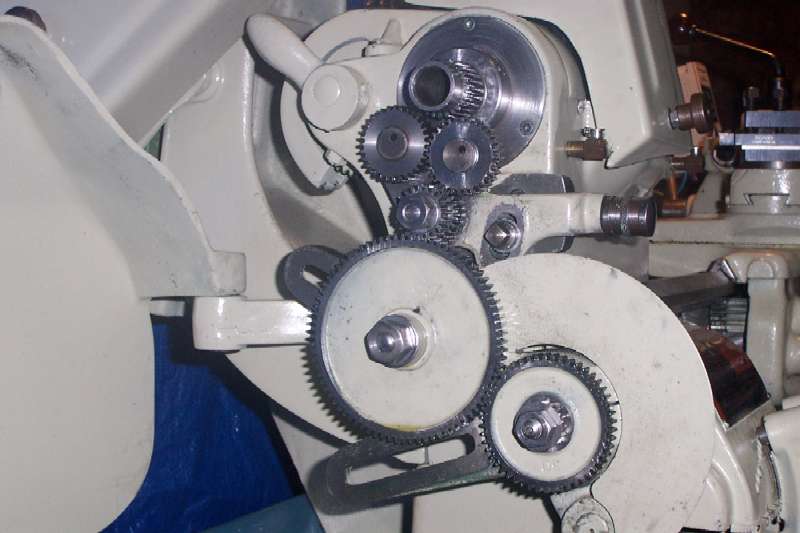
It took an hour or so to wire brush all the paint and old grease and swarf out of the back gears, they now work albeit with a tooth rattle. They don't seem to have got a lot of use.
It took three hours to pull down the tumbler reverse and banjo, and wire brush, clean and adjust all the bits. I used a diamond ezy-lap sharpener to knock off the worst of the high spots and reshape a few teeth that needed it. Could you believe they spray painted the lathe with the change wheels and leadscrew in place? FFS.
Running the saddle up and down showed a few stiff spots, including one particularly bad one that felt like a tooth skip. I couldn't see much wrong. I used the ezy-lap to stone off the high spots on the bed V-ways from the usual dings, that didn't make any difference. With the lathe going slowly, engaging screwcutting and running the saddle along almost stalled it in a couple of places. I marked the places.
Engaging the self act was worse, it almost stalled a few times and did stall once. Using the cross feed stalled it twice. I wasn't surprised at that, they'd painted the saddle with the cross slide on it. The edge of the paint is all torn from when it was first moved. I oiled the saddle extensively and manually cranked the cross slide a few times, it freed up a bit. Adjustment of the gibs has been left to later since the screws and nuts have all been painted over.
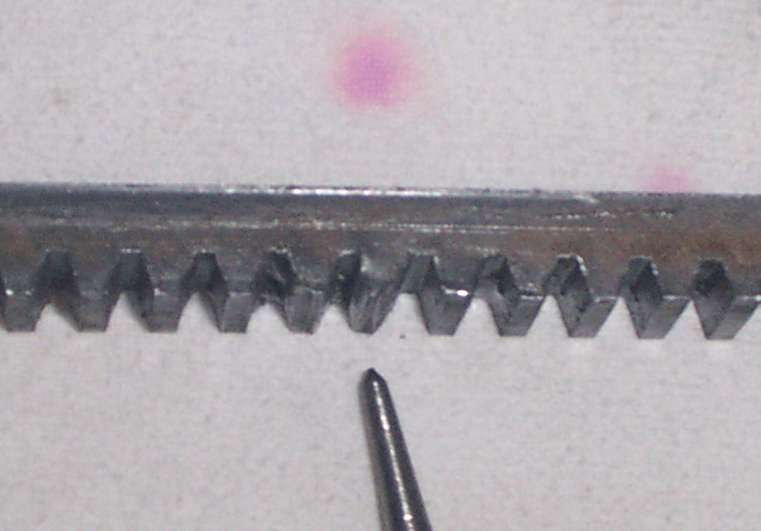
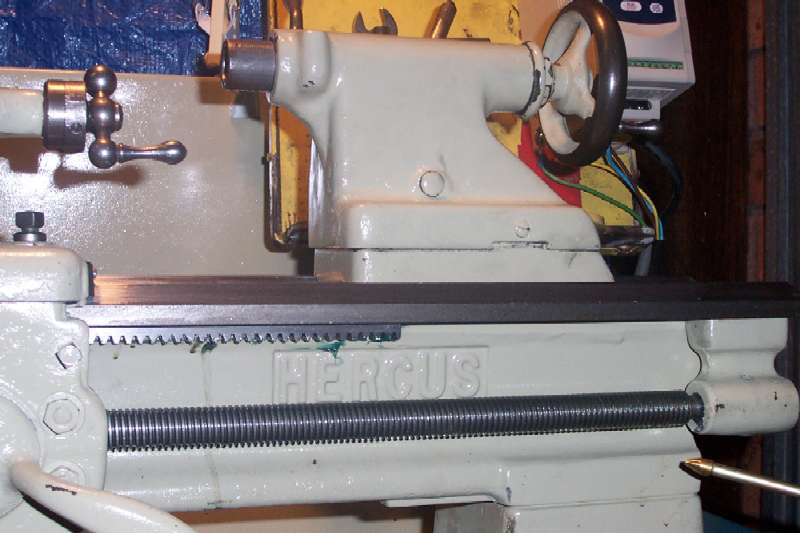
I got a torch and examined the rack at the marked points - at each point there was a malformed tooth, presumably from bits of shit being jammed in accidentally or on purpose.
I took the rack off for a better look. The rack is bent downward around six inches from the headstock end. It also has a slight curve throughout its length, and straightens out about nine inches from the tailstock end.

One of the teeth has actually been bent sideways, this is where the saddle was jamming up and stalling under self act. The only thing I can think of is that at some stage someone ran it in low backgear with the half nuts engaged, and poked something into the saddle pinion to see what would happen.
If it wasn't six PM on Friday by this stage I'd have thrown the bloody thing into the car and gone back to the "engineers" who "rebuilt" the lathe and whacked them over the head with it.
The good news is, and I think it is good news, is that without the rack, the saddle slides smoothly from one end of the bed to the other, without rock or shake.
A cursory examination - because cursing was all I felt like doing - of the tailstock showed the ram to have been used in a football match at some stage. The serial number of the tailstock doesn't match the bed.
It left a trail of paint chips whenever moved - of course it had been painted, including the ways underneath, and just plonked on the bed. I'll have a go at aligning it over the weekend. I may have to fork out for a 2MT reamer to get rid of the worst marks in the bore, but we'll see.
I need some help in doctoring the headstock preload - I've no idea at all, and don't want to pull it apart just for a look.
Also what do you recommend for the rack - do I go to a gearing supplier and try to buy a length, get a spare from Hercus, or try to straighten it and file the damaged teeth back to some sort of shape? In which case I won't have anything to throw back at the "engineers".
Given the state of the rest of the lathe - the paint is coming off in patches where they sprayed over the top of grease and swarf - I'm thinking it would be in my best interests to strip the saddle right down. I've never pulled apart a saddle with power feeds though. Is it something I can intelligently work my way through, or do I need the manual?
Are there any non-obvious oiling points? I replaced the yarn packing in the tumbler reverse pins, I'm inclined to leave the rest. Dirty oil is leaking out from the right places, so they must be working.
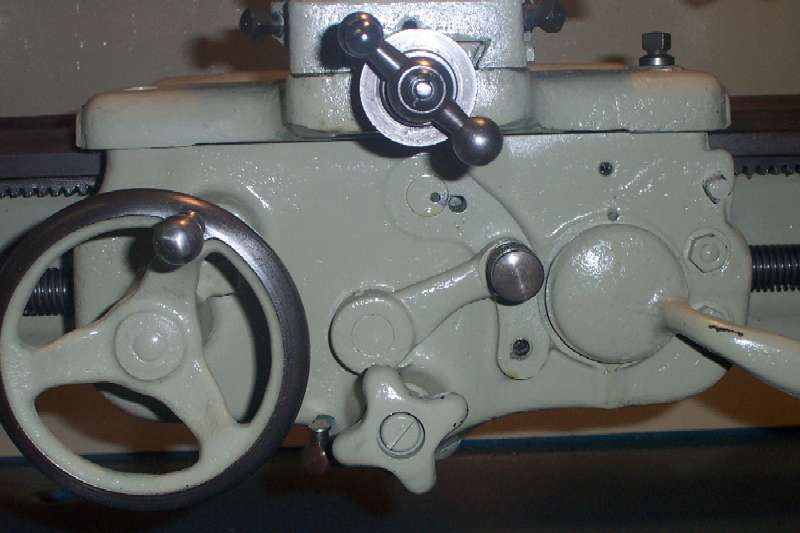
How does the saddle clutch star wheel work? Do you need to give it a good tighten to engage the feed, or is a light touch required? Is it normal for it to turn whenever the leadscrew is going, even if the star wheel has been turned anticlockwise?
What is the best way to align the countershaft? It's left-hand-high, and I don't reckon the pulleys are lined up either.
Sorry to bug you with such a longwinded note, but I'm rather proud of the remotoring job I did and don't want the rest of it to spoil my weekend.
April 8 2002
Well, it didn't spoil my weekend, but not a lot of progress was made either. I took the rack and original motor back to J&N on Monday and spoke to John. He initially was quite defensive - even with the rack in front of him he was telling me that I bought a second hand machine and couldn't expect it to be in new condition. When I said I only expected it to be usable he called me a perfectionist. In the end he said leave it overnight and he'd straighten it. After a bit more haggling he also said he'd file the damaged teeth.
April 9 2002
I picked it up the next day and it was pretty much straight and the teeth reasonable. Someone needs to tell them about soft jaws for vices though, there's nice diamond patterns pressed into it near the bends. That's the last time I've been to J&N Engineering and the last time I intend to go there.
More email:
Just letting you know that I got the rack back today, still a few high spots but a smooth file took care of those. Put it on and it works well, only a couple of places where the uneven teeth cause a little pause in travel, not where I'd usually be using it.
Spent a couple of hours stripping and cleaning the tailstock, its all ready to cut metal now.
Yeah right.
By this stage I'd cleaned the back gear, tumbler reverse and gears, bed and tailstock. Paint was coming off, either in chips or else just wiping off where the lathe had been painted over the top of old oil and grease. No prep, no primer, no undercoat, just spray on top of whatever was there. Machined surfaces, bearing surfaces, you name it. Paint everywhere, except where it was supposed to be. Nice beige paint becomes evil grey-green sludge when sprayed on top of grease and swarf.
April 11 2002
I sent out an SOS to the model engineering lists.
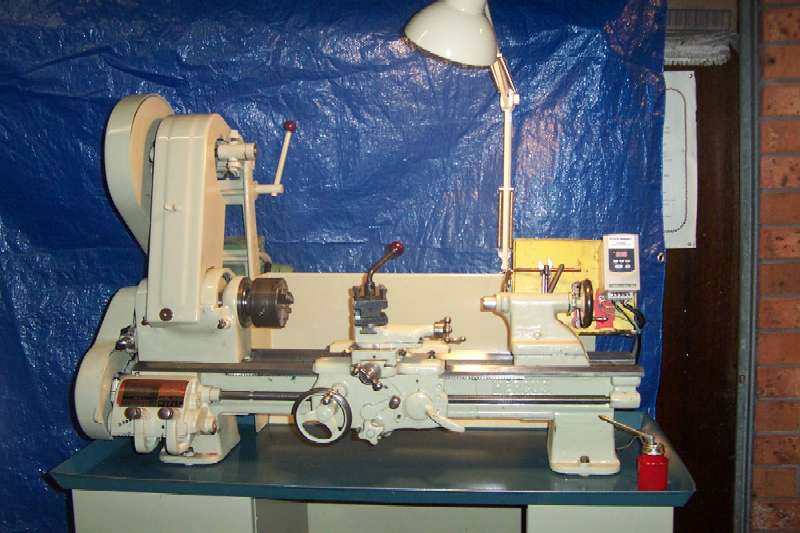
Guys'n'gals, I've finally got my rebuilt Hercus 9" delivered and I'm in the process of rebuilding it. (Don't ask.)
Hercus is an Australian Southbend clone, ref. the picture of the Southbend Model A at http://www.lathes.co.uk/southbend/page6.html and not the boxy later-version Hercus shown below it.
It's an ARM with roller bearing headstock and metric norton box and 3mm pitch leadscrew.
Are there people on the list who are experienced with these machines and who can advise me on the following areas, or point me to a reference source? I've got no manuals.
Headstock bearing preload.
Allegedly new bearings, I believe the preload is way more than it should be. My very limited experience of rb headstocks is that if you pull the back gear pin, you should be able to spin the spindle freely by hand, and if you've got a chuck, it should spin down for several seconds before stopping. This one is stiff and hard to turn by grabbing the spindle nose with one hand. It isn't the loose pulley because you can roll it easily with the belt slackened. It isn't the end float collar because I've slackened that off. Both bearings get warm (not hot) after a few minutes running light.
2. Countershaft and belt alignment.
Looks OK by eye, I reckon the LH countershaft bearing is high. It warms up slightly while the RH remains cool. To my untrained fingers it takes more effort to pull the belt by hand when it is on the fast groove (LHS) than when it is on the slow (RHS). How do you align the countershaft, and how do you get the pulleys properly in line?
3. Power feed apron
Seems to work OK but is noisy and chews a lot of power. Given the state of the rest of the rebuild I think it needs to be stripped, cleaned and put back together properly. Is this something you can do by methodical means, or does it require technical docs and special knowhow to get it back together?
4. The metric thing
Is there such a thing as a 127-tooth gear for the Hercus, and if so, is there any reference to cutting imperial threads on a metric box? Bit of a bitch that I can't cut an 8 tpi spindle nose thread... 3.175mm pitch isn't on the chart.
5. Spindle nose
It's never been cleaner in its life, but I have difficulty screwing things more than two or three threads onto the spindle. I've checked, both it and the chucks/faceplate are 8tpi and not 3mm pitch. From what I gather the spindle SHOULD be Whitworth, the female threads look more like 60deg with pointy bottoms and flattened crests. Is this normal with Hercus lathes, and a bit of oil and a two-handed twist used? Or should I be looking to clean out the threads with a 1-1/2" Whit tap?
6. Oiling
Any non-obvious oiling points? The machine is very similar to the Smart and Brown that we had when I was a teenager, but where the S&B had oil nipples the Hercus has plain holes. I've been picking the paint and crap out of every spare hole I've seen... also the headstock oilers, do they need a flood of oil before every session, or do you just fill until it leaks out and do a quick squirt top-up after that?
Thanks in advance,
Charlie
12 April 2002
I got a lot of excellent replies and some leads on the 127-120 combination gear. Nobody has specific knowledge of the headstock preload but I've got good generic info.
I decided to bite the bullet and have a look at the saddle. I took out the oil drain plug and nothing came out. That was funny, I'd been pumping enough in... a small mirror showed a solid plug of greasy swarf up the hole. Similar inspection of the oil inlet revealed the level hadn't gone down in several days.
Oh well, I didn't have much planned for the weekend anyway.
Page 1 - Page 2 - Page 3 - Page 4 - Page 5 - Page 6 - Page 7 -